
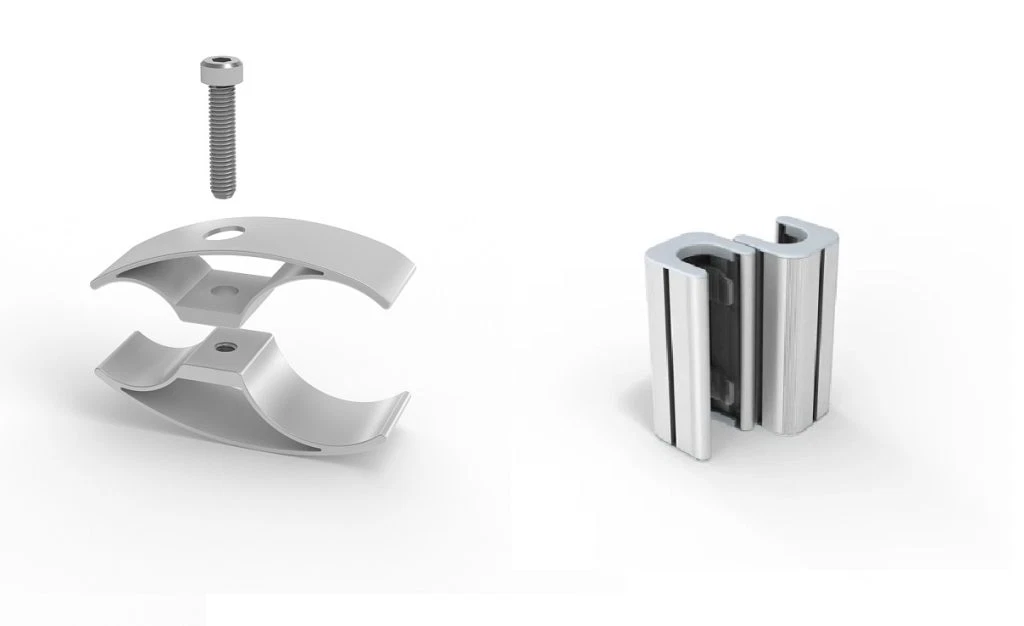
When electrical, mechanical, or structural components need to be joined securely, the quality of the connection can determine the reliability of the entire system. The connecting clamps are commonly used to create stable connections between conductors, pipes, cables, rods, and other components. Choosing the right clamp, however, requires more than selecting a size that appears to fit.
A poorly selected or incorrectly installed clamp can loosen under vibration, develop corrosion, create excessive resistance, or fail when exposed to mechanical stress. Understanding how these components work and what factors affect their performance helps installers and maintenance teams make better decisions.
What Are Connecting Clamps?
Connecting clamps are fastening components designed to join two or more elements while maintaining a secure mechanical connection. Their exact design varies according to the application. Some clamps are designed for electrical conductors, while others connect pipes, rods, cables, structural members, or specialized equipment.
In electrical applications, a clamp may establish a conductive path between components. The clamp must therefore provide sufficient mechanical pressure while maintaining reliable electrical contact.
In mechanical applications, the primary objective may be preventing movement between connected parts. The clamp’s material, shape, fasteners, and load capacity become particularly important.
Common designs include bolted clamps, compression-style clamps, U-bolt clamps, parallel clamps, grounding clamps, and specialized connection fittings. Each type serves a different purpose, so application requirements should always guide selection.
How to Choose the Right Connecting Clamp
Selecting a suitable clamp involves evaluating several factors rather than relying solely on dimensions.
1. Identify the Application
Start by determining exactly what needs to be connected. Electrical conductors require different characteristics than plumbing components or structural members.
For example, an electrical connection may require excellent conductivity and corrosion resistance. A pipe connection may instead prioritize mechanical stability and resistance to pressure or temperature.
Clearly defining the application prevents many selection errors.
2. Measure the Components
Accurate measurements are essential. Check the diameter, width, thickness, or cross-sectional dimensions of the components being joined.
A clamp that is too large may not generate adequate pressure. One that is too small can place excessive stress on the connected component or fail to accommodate it properly.
When working with cables or conductors, consider the actual conductor dimensions rather than estimating based on appearance.
3. Consider the Material
Material compatibility can significantly influence service life.
Common clamp materials include stainless steel, copper, aluminum, galvanized steel, and various engineered alloys. The best option depends on the connected materials and environmental conditions.
For instance, stainless steel can be useful where corrosion resistance is important. Copper may be appropriate for certain electrical connections because of its conductivity. Aluminum components require particular attention to compatibility because aluminum and other metals can behave differently when exposed to moisture.
4. Evaluate Environmental Conditions
A clamp used indoors in a clean, dry environment faces different challenges from one installed outdoors.
Consider exposure to:
- Moisture
- Salt or chemicals
- Extreme temperatures
- UV radiation
- Dirt and dust
- Continuous vibration
- Mechanical loads
For coastal or industrial environments, corrosion resistance deserves particular attention. In high-vibration installations, resistance to loosening becomes equally important.
Step-by-Step Installation Strategy
Correct installation is just as important as selecting the correct component.
Step 1: Inspect the Connection
Before installation, examine the components and clamp. Look for damaged threads, deformation, corrosion, contamination, or manufacturing defects.
Do not install a visibly damaged clamp simply because it appears usable. A small defect can become a significant failure point after the system is placed under load.
Step 2: Clean the Contact Surfaces
Remove dirt, oil, oxidation, paint, and other contaminants when the application requires clean contact surfaces.
Electrical connections deserve special attention because contamination or oxidation can increase contact resistance. Follow the equipment manufacturer’s recommendations before using abrasives or cleaning chemicals.
Step 3: Position the Clamp Correctly
Place the clamp so that pressure is distributed properly across the connection.
Avoid forcing components into alignment using the clamp itself. If excessive force is required to position the parts, investigate the underlying alignment problem first.
Step 4: Tighten According to Requirements
Fasteners should be tightened according to the manufacturer’s specified torque when a torque value is provided.
Overtightening is not automatically better. Excessive force can damage threads, deform the clamp, crush softer materials, or create unnecessary stress.
Undertightening can produce the opposite problem by allowing movement or reducing contact pressure.
Step 5: Perform a Final Inspection
After installation, check the connection visually and mechanically where appropriate. Confirm that the clamp is seated correctly and that the connected components remain properly aligned.
For critical systems, additional electrical, mechanical, or continuity testing may be appropriate.
Common Mistakes and Challenges
One frequent mistake is choosing a clamp based only on diameter. Two components may have similar dimensions but require completely different connection methods because of their materials, loads, or operating environment.
Another problem is mixing incompatible metals without considering corrosion. When dissimilar metals are exposed to moisture, galvanic corrosion can occur. This may gradually weaken the connection.
Improper tightening is also common. Workers sometimes rely on feel instead of following specified torque requirements. While experienced technicians can recognize obvious problems, critical connections should follow documented installation procedures.
Contamination presents another challenge. Dirt, grease, oxidation, and paint can interfere with contact and reduce connection reliability.
Finally, reused hardware can create uncertainty. A clamp or fastener that has experienced deformation, corrosion, or excessive loading may no longer perform as intended.
Practical Tips for Better Results
Match the clamp to the actual application. Manufacturer specifications should take priority over assumptions based on appearance or previous installations.
Keep installation records for critical systems. Recording the clamp type, size, material, installation date, and torque settings can make future maintenance much easier.
Inspect connections periodically. Look for corrosion, looseness, cracking, deformation, discoloration, or signs of overheating.
Consider the complete assembly. A high-quality clamp cannot compensate for poorly prepared components, damaged fasteners, or incorrect alignment.
Account for movement. Thermal expansion, vibration, and mechanical loads can affect connections over time. A design that works under static conditions may require additional consideration in dynamic environments.
Follow applicable standards. Electrical, industrial, structural, and mechanical installations can be subject to different codes and manufacturer requirements. The appropriate standard should be identified before installation rather than after a problem occurs.
A practical example is an outdoor electrical connection exposed to rain and temperature changes. Simply selecting a clamp that fits the conductor may not be enough. The installer must also consider corrosion resistance, conductor compatibility, contact quality, environmental sealing where applicable, and proper tightening. These details can make the difference between a connection that lasts for years and one that requires repeated maintenance.
Conclusion
Connecting clamps may be relatively simple components, but their role in maintaining secure and dependable connections is important. The right selection depends on the application, component dimensions, materials, environmental conditions, and expected mechanical or electrical loads.
Reliable installation requires accurate measurement, clean contact surfaces, proper positioning, controlled tightening, and appropriate inspection. Avoiding common mistakes such as material incompatibility, overtightening, contamination, and incorrect sizing can significantly improve service life.
Ultimately, the best approach is to treat every clamp as part of a complete connection system. When selection and installation are based on actual operating requirements rather than convenience, connections become safer, more durable, and easier to maintain.